
8 Steps to Building a Pumpkin Bong 🎃
It's that time of year. Autumn has arrived! Everyone has their own favorite part about fall. We're sure you've seen all the pumpkin-everything memes and Instagram posts. However, we'd like to point out that autumn is definitely one of the best times to smoke a bowl. It's much easier to celebrate the end of summer when you're sitting next to a fire and basking in the glory of fresh herbs.
Making a pumpkin bong will help you embrace the fall spirit and your favorite hobby simultaneously! Not sure exactly how to do this? We’ve put together a definitive guide for smokers to do this project with positive results guaranteed. Read on to learn how you can make a pumpkin bong that even Charlie Brown himself would be jealous of.
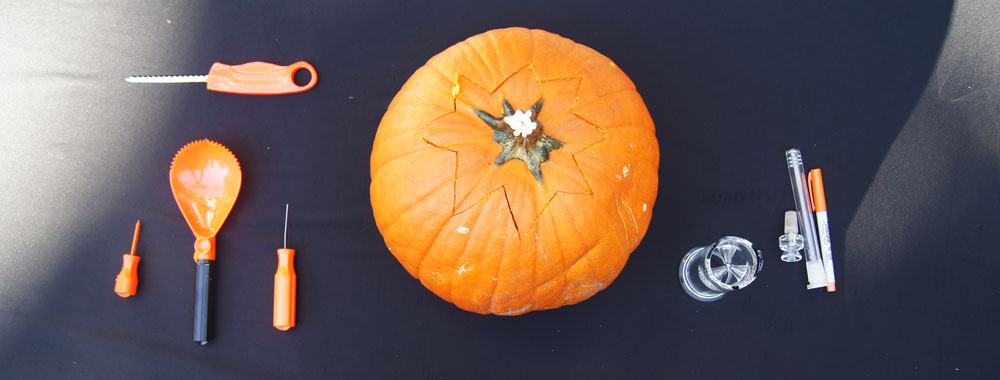
What You Need:
- Sharpie (we recommend not using an orange one like we did 😞 )
- A Bad Ass Pumpkin
- Glass Downstem - get it here...
- Bowl Piece - get it here...
- Mouthpiece (from a broken bong) or just a straw will do
- Knife (or other carving tool)
- Spoon
1. Find the Right Pumpkin
You’ll want to prioritize height over roundness, since there must be enough space for both a downstem and a mouthpiece. When you get to the pumpkin patch, just imagine having to add these pieces to your pumpkin and leave enough space. A larger pumpkin may be harder to toke, so handheld pumpkins may be more manageable.
2. Mark Placement for Downstem And Mouthpiece
Before taking any permanent steps, you must map out your cuts, like a blueprint. Do not try to improvise! Mark the spots where you'll make the following cuts on the pumpkin using your Sharpie marker:
- Downstem hole: The downstem should be on the side of the pumpkin, going at a 45 degree angle toward the bottom of the pumpkin.
- Mouthpiece hole: The mouthpiece should be either on top of the pumpkin or toward the top of the pumpkin. Make this decision based on how you feel most comfortable smoking.
- Top of the pumpkin: The cut at the top of the pumpkin should be wide enough that you can efficiently clean the pumpkin, but not too wide that it interferes with the mouthpiece or downstem holes.
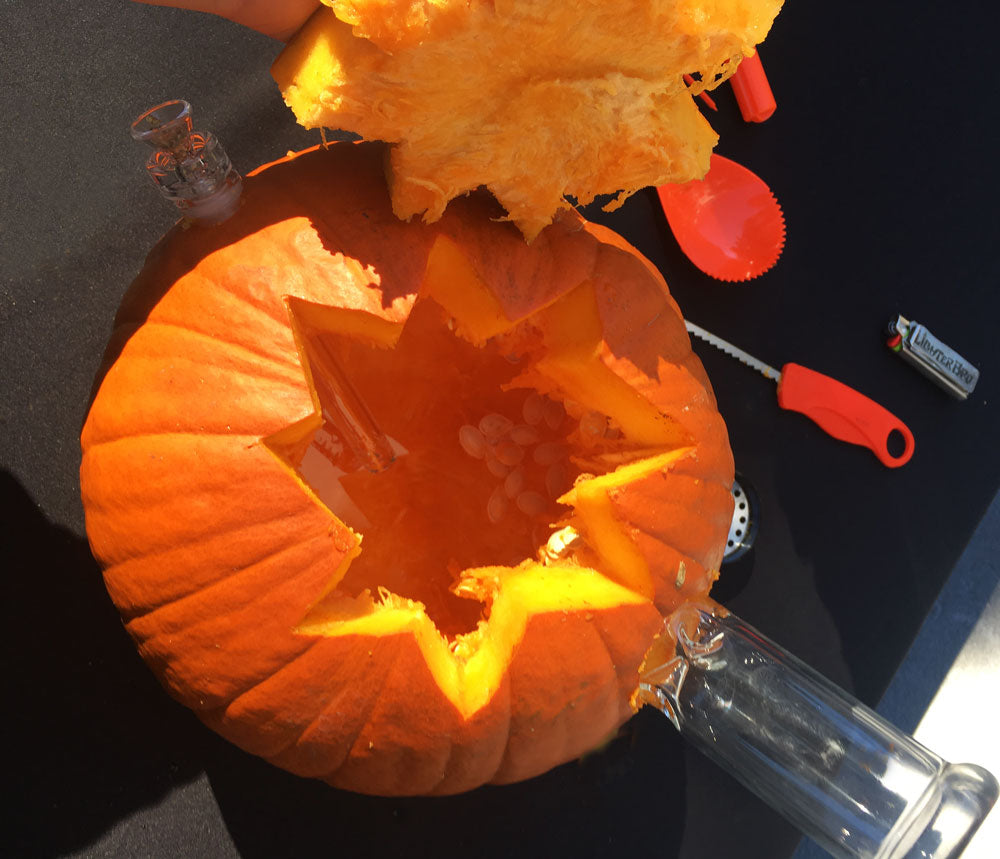
3. Cut the Top of the Pumpkin
With a precise measuring tool and a very sharp blade, responsibly (and safely) cut the top of the pumpkin. Be sure to keep this piece intact and nearby. Also, be careful to avoid slicing the downstem/mouthpiece area. You'll need the seal to be as clean as possible, so don't blindly hack at your pumpkin. You'll need to replace the top in order to seal the bong completely.
Note: We cut the top with a jagged zig-zag pattern. However, we found that a single circular incision will minimize the surface area of the cut and air exposure. Please learn from our mistakes.
4. Clean the Inside of the Pumpkin
After removing the top, clean out the “guts” of the pumpkin using a spoon. This will remove any obstructions for both the water and smoke, allowing for the smoothest, freshest smoking possible. To fully clean it, flush the inside of the pumpkin out with water.
Don’t forget to clean the guts off of the top piece as well! When you're finished cleaning the pumpkin, it should essentially be hollow. After cleaning the pumpkin, place the top back on.
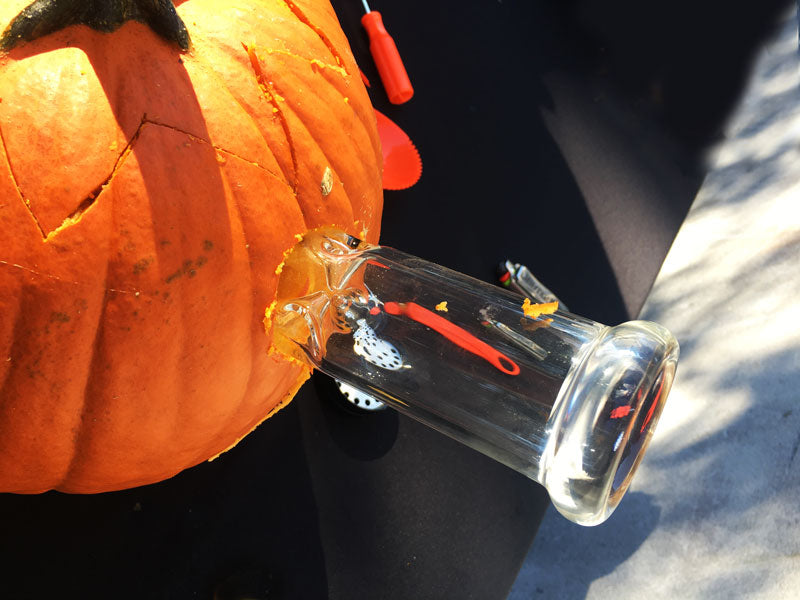
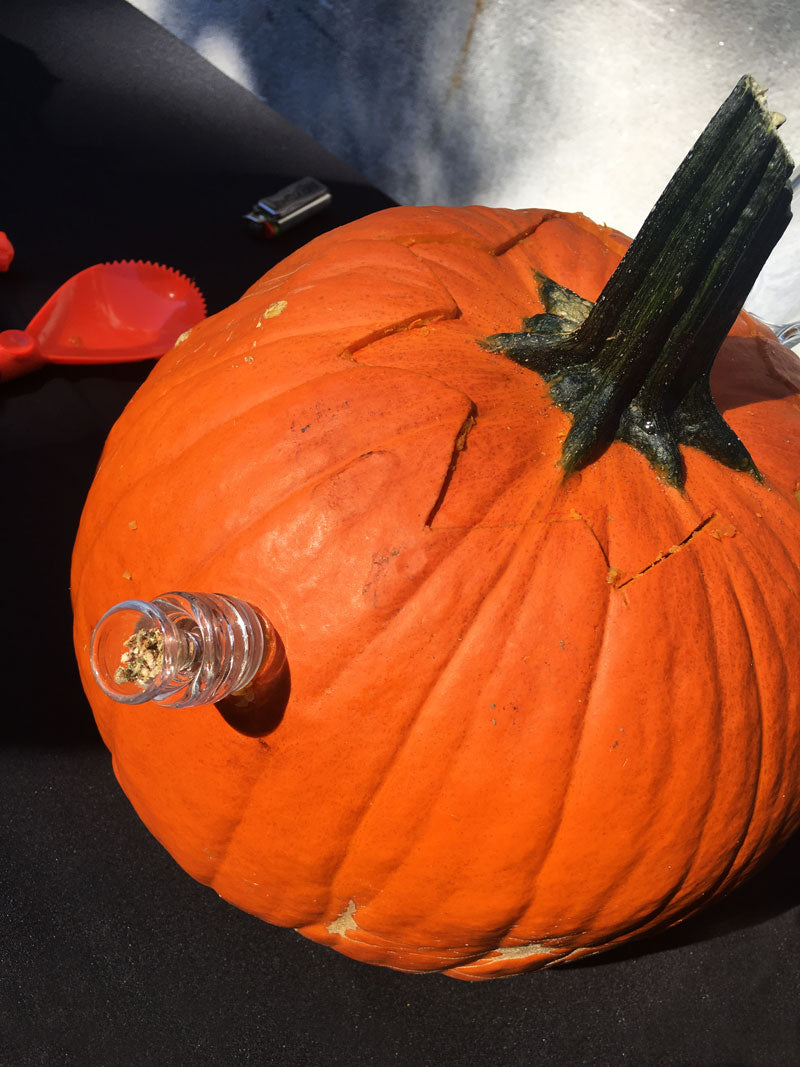
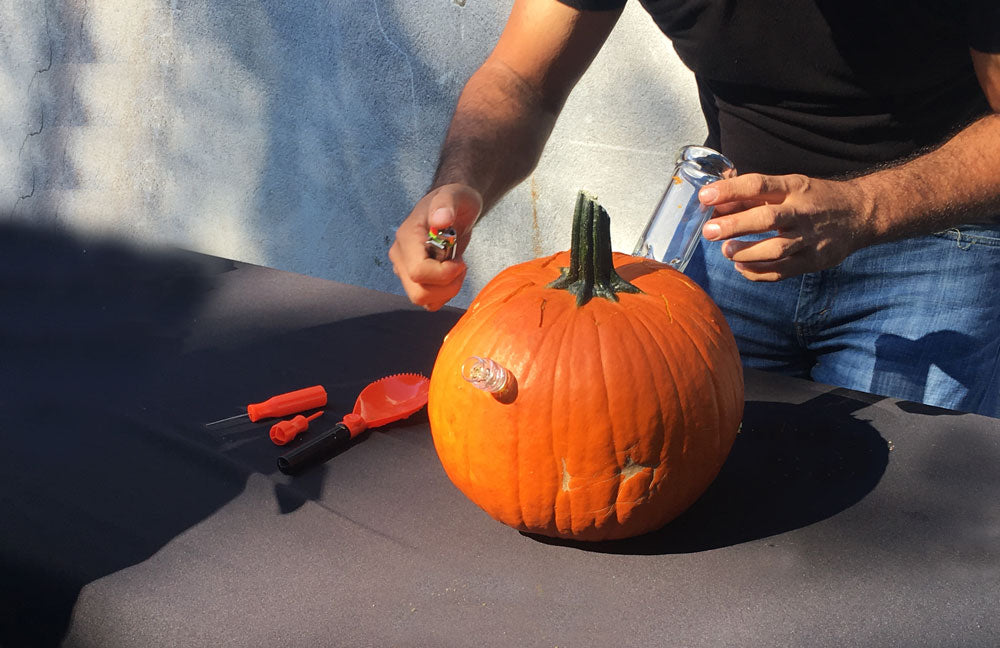
5. Install Downstem/Bowl
Completing this step carefully is super important. Carve out this designated area using a sharp knife, but keep the lower portion of the hole at a 45 degree angle. This will keep the downstem pointing down, preventing splash back. Place the downstem inside the hole. Finally, place the bowl on the end of the downstem.
6. Install Mouthpiece
If you haven’t already done so, place the top of the pumpkin back on. Next, carve out the mouthpiece portion of the pumpkin using your carving tool. Then, place the mouthpiece inside the hole.
In lieu of a mouthpiece, you can also use a straw. In this case, you'll want to use a much smaller tool, such as a screwdriver, to puncture the pumpkin.
7. Add Water
If you add a small amount of water, it will make the smoke flow much smoother. If you want the pumpkin to function more like a bowl or dab rig, then don’t add water.
8. Optional: Decorate the Exterior
While it won’t necessarily improve your smoking experience, it will add some much-needed character to your bong. Using a permanent marker, create a design that's indicative of fall or Halloween!
DO NOT cut your pumpkin bong like a normal jack-o-lantern, as this will cause the smoke to escape. Duh.
Congratulations!
You’ve successfully created a pumpkin bong fit for champions. Feel free to show off your masterpiece at Halloween parties, normal smoking sessions, binge-viewing get-togethers, and maybe even Thanksgiving.
If You’re More of a Dabber…
We have you covered.
Instead of putting in a normal bowl or downstem, use a titanium nail for dabbing. In the case of a dab rig, it’s even more important to ensure that the nail is situated at the appropriate angle.
Also, don’t add water.
After the Fact
If you enjoyed smoking out of your pumpkin bong, then continue to do so as long as you like. Eventually, however, all good things must come to an end. When the pumpkin begins to rot, obviously it's time to discard it.
You now have learned how to master the ancient, illustrious art of pumpkin bong creation! You will also have acquired a mouthpiece and a downstem, which will be compatible with other bongs in future smoking endeavors. What a fantastic way to ring in the fall and celebrate the impending Halloween season! Happy Halloween!